


Exploring a crate! Rocket
Develop web applications quickly and robustly

Rocket has soared to popularity, becoming a go-to for Rustaceans aiming to develop web applications quickly and robustly. It stands out for its emphasis on safety, speed, and simplicity. In an ecosystem thriving on performance and reliability, Rocket has carved out its place by offering tools that mesh well with Rust's guarantees of memory safety and concurrency.
With the stack set, let's get ready to launch into the world of Rocket with Rust. Here's where we buckle up and start our engines with a `Cargo.toml` entry in a toml file:
[dependencies]
rocket = "0.5"
It's as straightforward as adding a dependency, and with that, the gears are in motion.
Understanding the Rocket Crate
Rocket is a web framework for Rust with a focus on ease-of-use, expressibility, and speed. You use it to write fast web applications with a minimal amount of boilerplate code.
When using Rocket, you get access to powerful tools right out of the gate. It's well known for features like:
- Type-Safe Routing: Define routes with function signatures and let Rocket ensure that incoming requests match the defined parameters.
- Request Handling: Rocket provides a simple, yet powerful approach to handling requests, relying on Rust's strong typing system.
- Templating Support: With Rocket, you can render responses using templating engines such as Handlebars or Tera, integrating them into your application seamlessly.

- State Management: Share state between route handlers using managed state.
- Built-in Testing Library: Write unit and integration tests for your routes easily.

The benefits of using Rocket are tied closely with Rust's own advantages—performance and memory safety. Rocket's design heavily leverages Rust's type system and code generation to provide a level of safety that is uncommon in web development frameworks.
Setting Up Rocket
To set up a new project with Rocket in Rust, think of it like you are planting a garden. First, you need the right tools, and, second, you need to know where and how to plant your seeds. For your Rust project, these "tools" are dependencies in your `Cargo.toml` file, and your "seeds" are the bits of code that establish your application's structure in `main.rs`.
Configuring Your Application
With the Rocket dependency in place (in the toml filte), you move on to your `main.rs` file. This is where you sketch out the foundation of your app. You start your Rocket application with `rocket::ignite()`, which performs all the setup work.
Here's how you kick things off:

In this snippet:
- `#[macro_use] extern crate rocket;`: This macro imports Rocket, making its features available in your application.
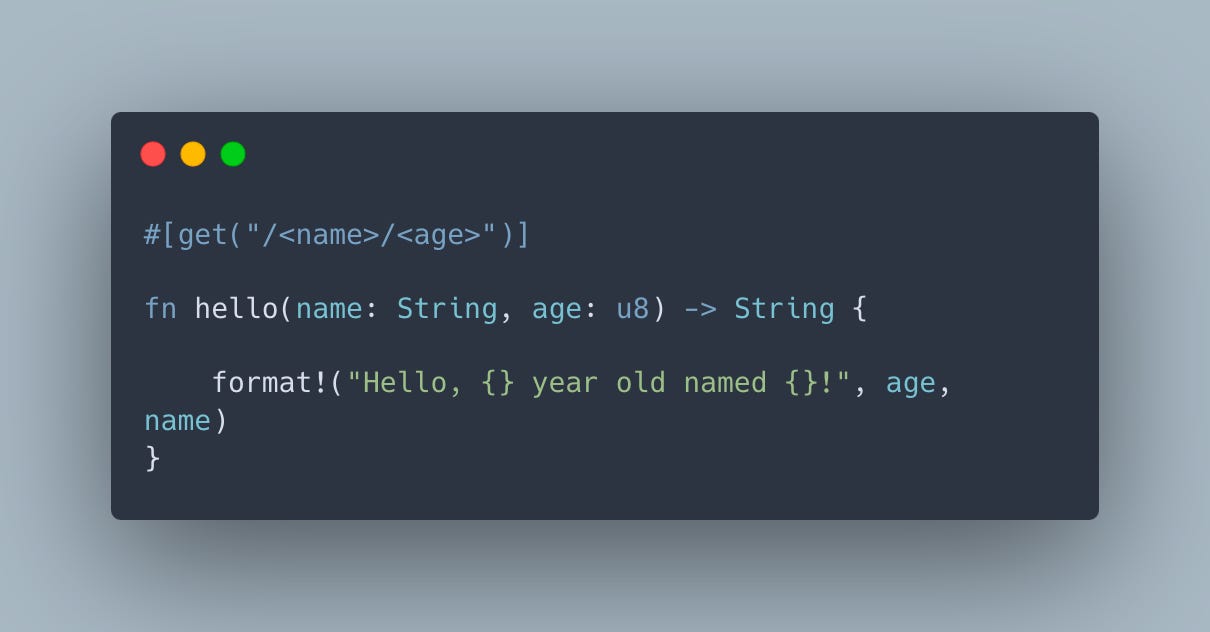
- `#[get("/")]`: This is a route attribute that listens for GET requests to the '/' path.
- `fn index() -> &'static str`: This function is the request handler for the '/' route. It simply returns a 'Hello, world!' response.
- `fn main()`: The `main` function is the entry point for your app. `rocket::ignite()` starts the Rocket application, `.mount("/", routes![index])` mounts the index route at the root path, and `.launch()` starts the web server.
And there you have it. Just like that, you've set the stage for a Rust web application using Rocket. From here, you can grow your application's capabilities by adding more routes, handling more types of requests, and integrating databases or other services. The beauty of Rocket is that it's intuitive—much like weeding your garden, the more you do it, the easier it gets, and soon you'll have a flourishing space that's all your own.
Use Case: Todo List API
Let's dive into making a practical Todo List API with Rocket. This intermediate application requires managing a simple data structure and providing an interface for users to create, retrieve, update, and delete items on their todo list.
First, let's sketch out what we need:
1. A `Todo` struct that represents an item on the list with fields such as `id` and `task`.
2. A Rocket state, which acts as our datastore for the todo items.
3. Routes for CRUD operations—each with their own handler functions.
Let’s begin by defining our `Todo` struct:
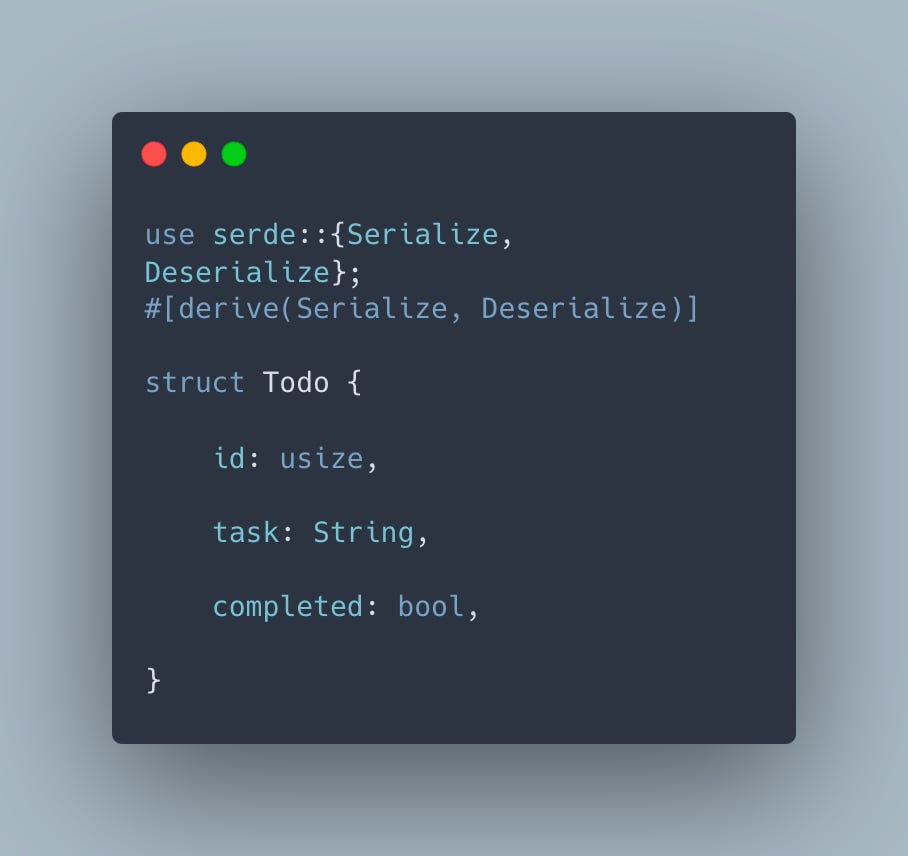
The above structure uses `Serialize` and `Deserialize` from the `serde` crate—crucial for converting Rust objects to JSON and vice versa, as we will be dealing with HTTP requests and responses in JSON format.
Now, with our `Todo` item ready, let's cover the four primary CRUD operations:
Adding a Todo Item
To add an item, we need a POST route:

The `create` function accepts JSON data, adds it to the todo list state, and returns the added `Todo`.
Retrieving the Todo List
For reading the list, we implement a GET route:

The `read` function fetches and returns all the todo items in a JSON format.
Updating a Todo Item
An update operation uses a PUT route and requires route ranking to allow dynamic URI segments:
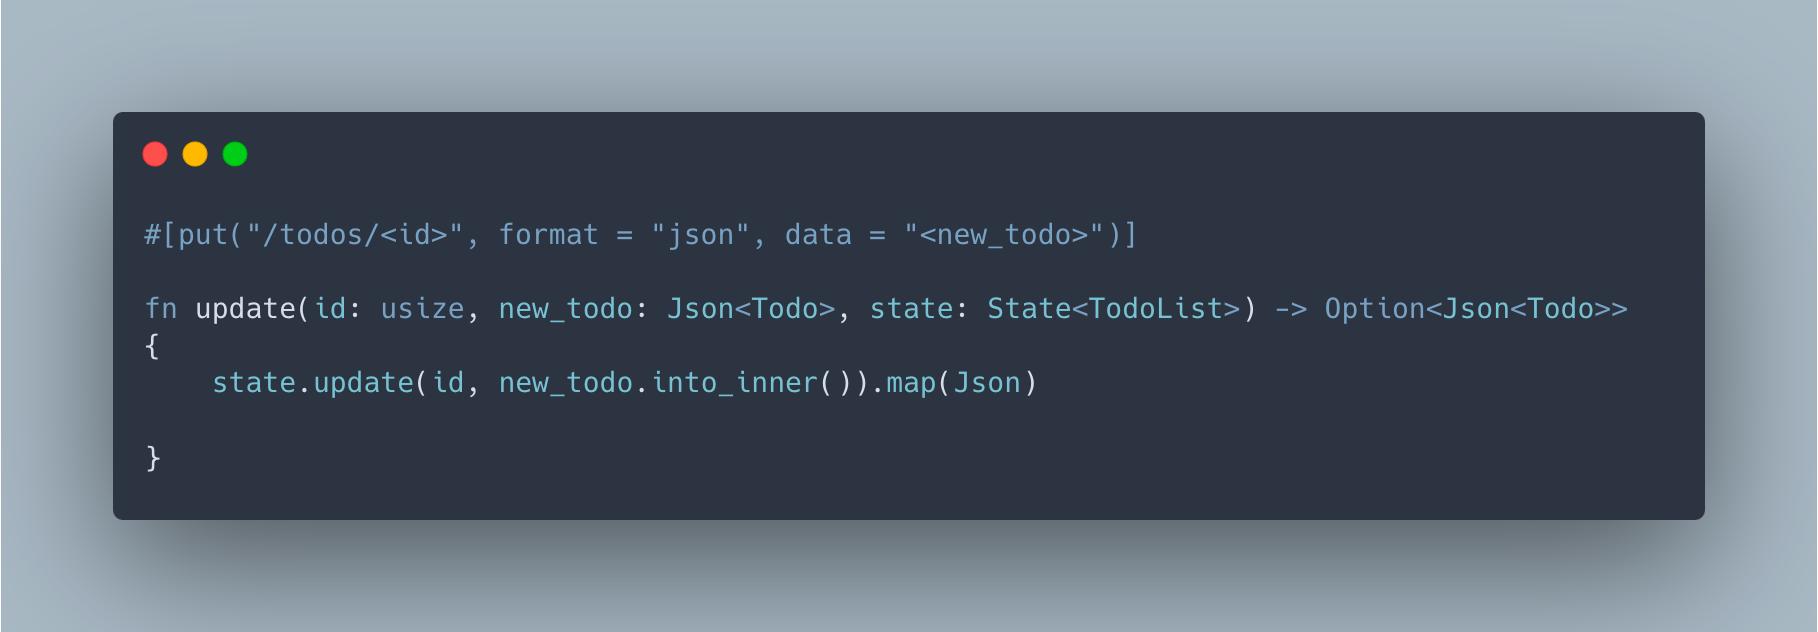
The use of `<id>` in the route dynamically matches part of the URI as a parameter.
Deleting a Todo Item
Lastly, we need a DELETE route:
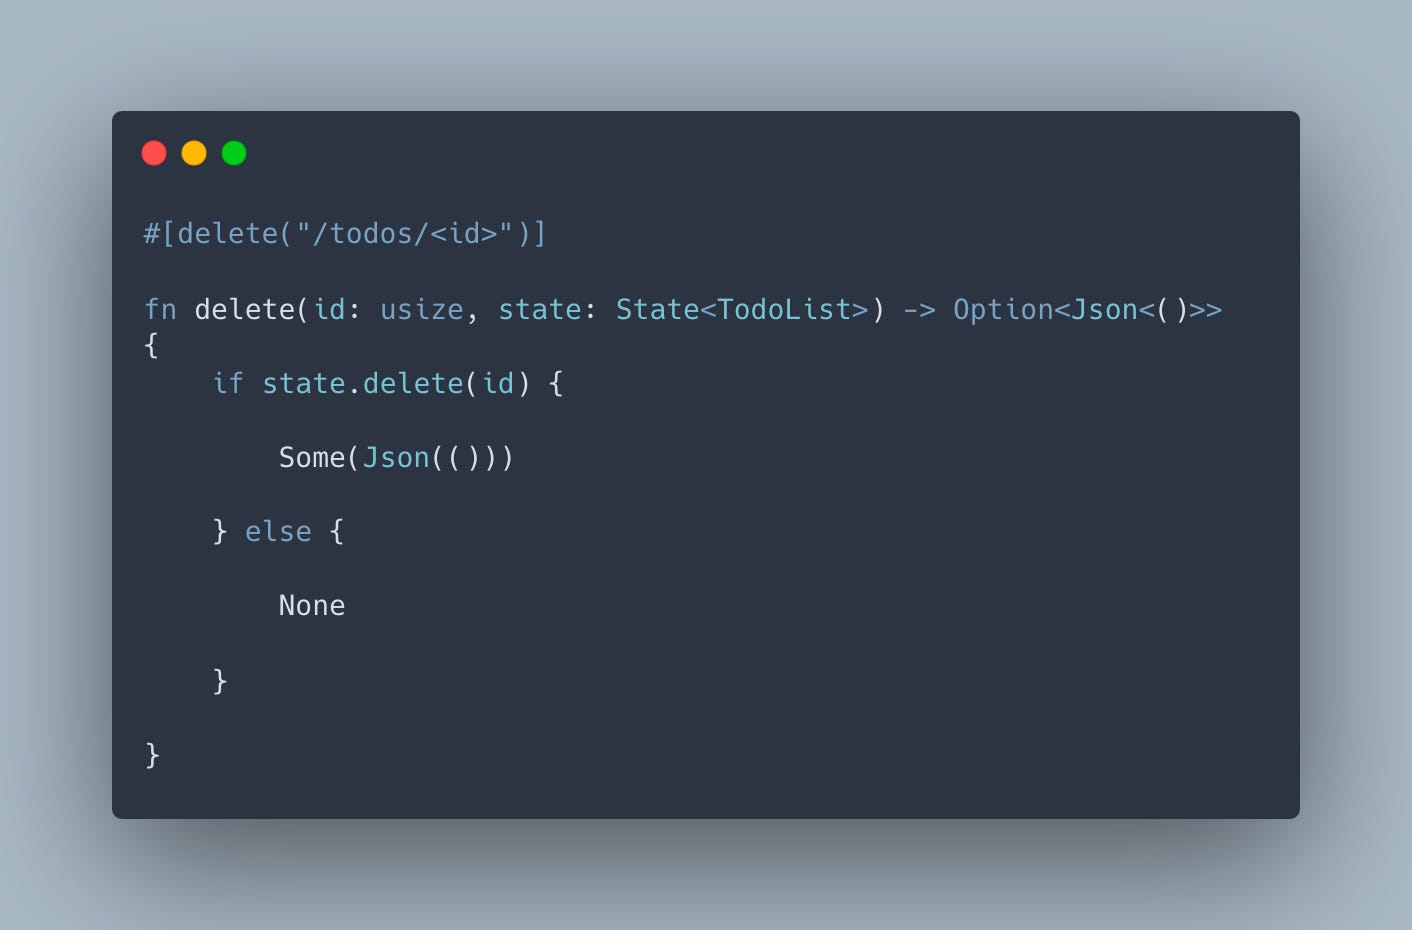
The `delete` function removes the item with the given `id`.
Mounting Routes and Launching the App
We mount these routes on a Rocket instance:
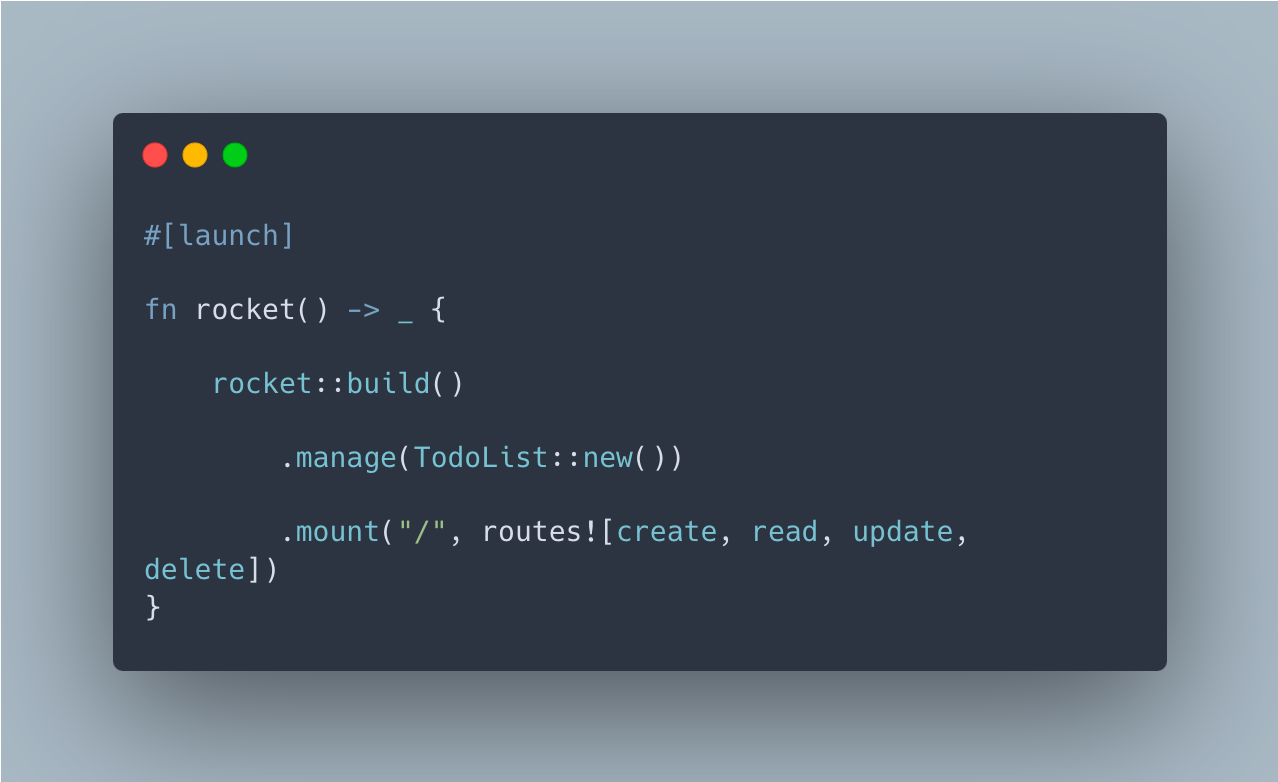
With these routes in place, test your Todo API using `curl` or Postman by sending appropriate HTTP requests to your local server. Ensure to run the server using `cargo run` and then interact with your API to create, retrieve, update, and delete todo items.
This example demonstrates how creating wealth in software, akin to what startups do, can lead to impressive productivity and outcomes. Much like in startups where understanding the depth can provide an edge, in software development, knowing the nitty-gritty of web frameworks like Rocket can enable developers to craft robust and efficient applications.